Your iPhone running iOS 26 has three separate document scanners built into three different apps, and you don't need to download a single thing to scan, sign, or export a PDF. Notes handles quick captures. Files organizes scans into folders. And the Preview app, which arrived with iOS 26, does the heavy lifting that used to cost ten dollars a month in third-party subscriptions.
The catch is that each scanner saves your document somewhere different, handles multi-page PDFs differently, and offers a completely different set of editing tools after the scan finishes. Picking the wrong one means re-scanning from scratch, and that's the kind of friction that sends people straight back to Adobe Scan.
I want to walk through exactly how each scanner works, where each one falls short, and the specific workflow that lets you ditch paid scanner apps entirely.
Notes Is the Scanner You Already Know
The Notes app has included a document scanner since iOS 11, which means it has been sitting on your iPhone for the better part of a decade. Open any note, tap the paperclip icon at the bottom, then tap Scan Documents. The camera opens with a yellow overlay that tracks the edges of whatever you point it at.
In Auto mode, the scanner fires the shutter the moment it detects stable edges. I find Auto mode too eager when I'm scanning receipts on a cluttered kitchen counter because it grabs the placemat edge instead. Switching to Manual mode by tapping the word "Auto" in the top corner gives you a physical shutter button and volume-button capture, which is far more reliable when the background isn't a clean, contrasting surface.
The real power here is speed. Tap the shutter, adjust the corner handles if the crop is off, tap Keep Scan, and repeat for the next page. When you tap Done, Notes stitches every page into a single embedded PDF right inside the note. No file-naming prompt, no folder selection, no friction at all.
It does, though, mean that your scanned lease agreement lives alongside your grocery list and your meeting notes from last Tuesday. At scale, this becomes a problem. I've lost track of scanned documents in Notes more than once because the app treats every note the same way, and scrolling through two hundred notes looking for a scan from three months ago is genuinely tedious.
One detail most guides skip: the color filter selector hidden behind the three-circle icon at the top of the scanner. It defaults to Color mode, which produces files around 1.5 megabytes per page. Switching to Black & White drops a three-page scan from 4.4 megabytes to roughly 75 kilobytes. For text-heavy documents like contracts or tax forms, Black & White produces sharper, smaller files with better contrast.
Files Puts Your Scans Where They Actually Belong
The Files app uses the exact same scanning engine as Notes. Same yellow edge overlay, same Auto and Manual modes, same color filters. The difference is entirely about what happens after the scan.
Open Files, navigate to the folder where you want the scan to live, tap the three-dot menu at the top, and select Scan Documents. After scanning and tapping Done, Files prompts you to name the file and choose its save location. The result is a standalone PDF sitting in your folder hierarchy, synced through iCloud Drive, and visible in Finder on your Mac within seconds.
This is the scanner I reach for when I'm dealing with anything I'll need to find later. Tax receipts go into a "2026 Taxes" folder. Warranty cards go into "Home > Appliances." The organizational structure already exists in Files, and the scanner respects it. Notes doesn't give you that option, which is a strange omission given that Apple clearly built both scanners on the same foundation.
The one friction point: Files does not let you add pages to an existing scanned PDF after you've saved it. If you scan a four-page document and realize you missed page three, you need to start over. This is the exact limitation that pushes people toward paid apps, and it's where Preview earns its spot.
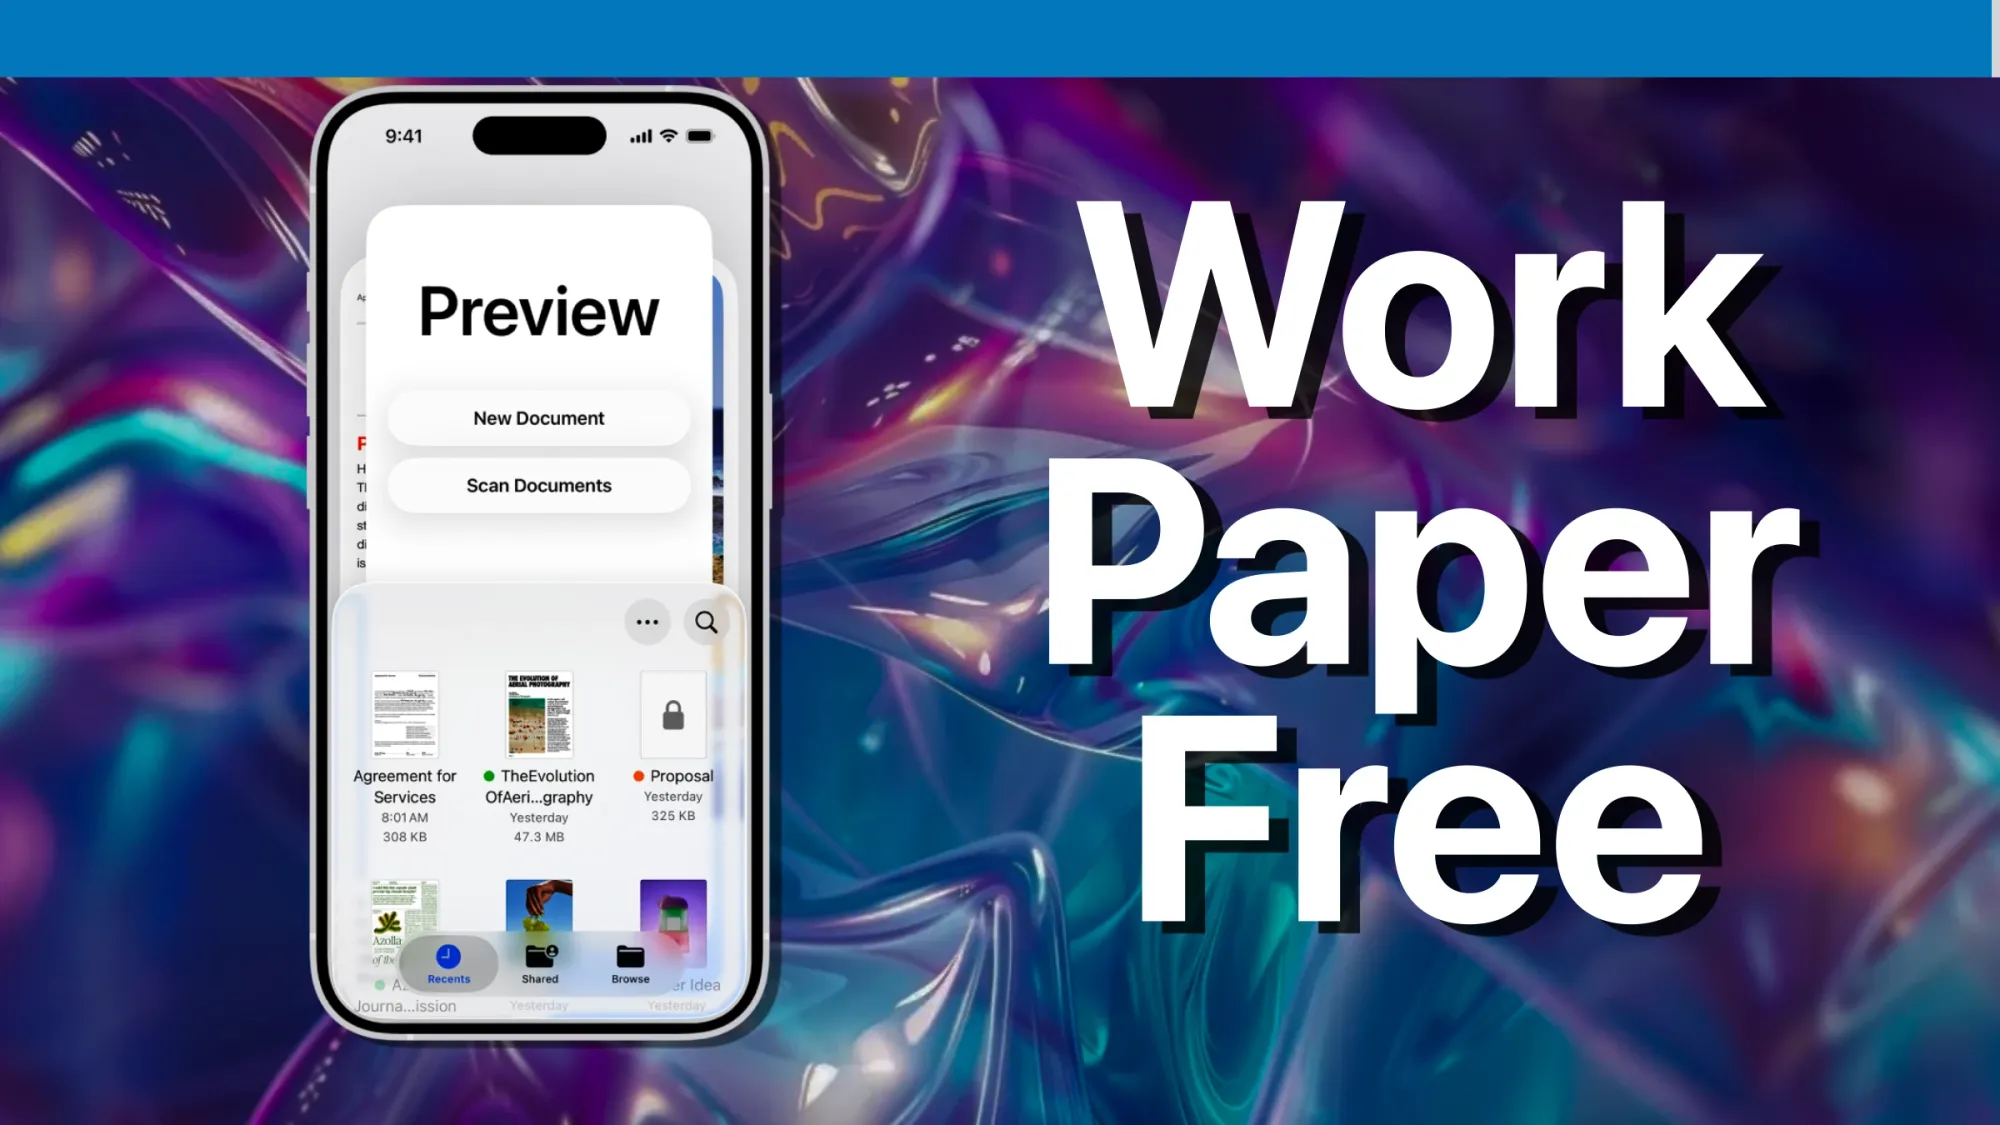
Preview Arrived in iOS 26 and Changed Everything
Preview has been a staple on the Mac for over two decades. In iOS 26, Apple finally brought it to iPhone, and it is genuinely the missing piece. If you've already explored how Preview transforms your iPhone into a paperless office, you know the basics. But the scanning workflow specifically deserves a closer look.
Launch Preview, tap Scan Documents on the main screen, and the same camera scanner opens. So far, identical to Notes and Files. The difference shows up the moment you finish scanning.
Preview opens the scanned PDF in a full editing environment. Swipe from the left edge to reveal page thumbnails. Touch and hold any page to reorder it, delete it, or rotate it. Tap the plus button to insert a blank page, a page from another file, or a fresh scan directly into the existing document. This is the feature that paid scanner apps charge for, and Apple buried it in an app that most iPhone owners don't even know exists yet.
Form filling is the other standout. Preview detects fillable fields automatically in compatible PDFs and lets you tap through them. It even pulls your name, address, and phone number from your Contacts card via AutoFill, which saves a genuinely surprising amount of time when you're filling out rental applications or medical intake forms on the go. For PDFs without built-in form fields, you can tap the plus button and add your own text boxes anywhere on the page.
And then there's PDF password protection. Tap the downward-pointing triangle next to the filename, select Lock, set a password, and the file is encrypted. No third-party app required. For anyone who has ever emailed a scanned tax document and felt vaguely uncomfortable about it, this is worth the iOS 26 update by itself.
Which Scanner Fits Your Workflow
All three scanners share the same capture engine: the same edge detection, the same perspective correction, the same color filters. The gap between them is entirely about what happens after you tap Done.
My approach: Notes for anything I'm capturing alongside meeting notes or brainstorming. Files for anything archival that needs to live in a specific project folder. Preview for anything I need to edit, sign, reorder, or lock before sharing. Once I stopped thinking of them as competing apps and started treating them as different tools for different moments, the paid scanner app on my home screen became redundant.
The Limitations Nobody Mentions
Here is the thing that every "best iPhone scanner" article glosses over: none of these three scanners produce searchable PDFs. The scanned pages are image-based. Spotlight cannot find text inside them. If you scan a hundred-page contract and later search for a clause about "early termination," you'll get nothing.
Live Text can recognize and let you copy text when you're viewing the scanned image, but it does not embed a searchable text layer into the PDF itself. For most personal scanning, this doesn't matter. For anyone building a searchable document archive, it's a dealbreaker, and you'll still need a third-party app with true OCR for that specific workflow.
The other gotcha is file size. Color mode, which iOS defaults to, produces scans around 1.5 megabytes per page. Scan a twenty-page document and you're looking at 30 megabytes. If your iCloud storage is already tight, switching to Grayscale or Black & White before scanning cuts file sizes dramatically. Black & White gets a three-page scan down to 75 kilobytes, which is a 98 percent reduction.
Scanning Tips That Actually Matter
Lighting makes or breaks a scan. The flash creates a harsh white hotspot in the center of the page and consistently produces worse results than ambient light. Turn it off. A desk lamp angled from the side, or a window with indirect daylight, gives you cleaner, more even results every time.
Surface contrast matters more than you'd expect. White paper on a white desk confuses edge detection. A dark desk, a colored folder, even a magazine underneath the document gives the scanner something to lock onto. I keep a navy blue folder specifically for scanning because it makes edge detection nearly instant.
Hold your iPhone roughly ten to twelve inches above the document, parallel to the surface. The scanner includes a subtle level indicator, but it disappears fast. If you're scanning multi-page documents, printing them first from your iPhone and then scanning the output might sound redundant, but it's genuinely the fastest way to digitize a stack of loose pages that arrived in your mailbox.
One more workflow most people miss entirely: Continuity Camera lets you trigger the iPhone scanner from your Mac. Control-click in a Finder window, Keynote slide, or Pages document on your Mac, select Scan Documents, and your iPhone's scanner opens automatically. The scan appears on your Mac the moment you tap Save. No AirDrop, no cables. Apple's support page on Continuity Camera has the full requirements, but both devices just need to be on the same Wi-Fi network and signed into the same Apple Account.

Olivia Kelly
Staff writer at Zone of Mac with over a decade of Apple platform experience. Verifies technical details against Apple's official documentation and security release notes. Guides prioritize actionable settings over speculation.
Related Posts
iPhone Storage Full and iCloud Cannot Fix It — Here Is What Actually Works
Mar 29, 2026
iOS 26.4 Has Nine Reported Bugs and Every Fix That Actually Works
Mar 29, 2026
iOS 26.4 Gave Your CarPlay Dashboard Two Features Worth the Update
Mar 28, 2026