🎧 Listen to this article
Prefer to listen? An audio version of this article is available for accessibility and convenience.
Your AirPods have somewhere between 15 and 40 individual settings on your iPhone, depending on which model you own. Most of them live inside Settings, then your AirPods’ name at the top of the screen — but a handful are scattered across Accessibility, Siri, and the Control Center. The real issue is not complexity. It is that Apple spread them across five different menus and never told you where to look.
I went through every AirPods model currently sold — AirPods 4, AirPods 4 with Active Noise Cancellation, AirPods Pro 3, and AirPods Max — and documented every setting available in iOS 26. Some of these showed up with no announcement. Others have been here for years and still go untouched because they sit three taps deep. This is the complete map.
If you only read one section, jump to gestures. That is where most owners leave the biggest gains on the table.
 Ad
AdWhere Your AirPods Settings Actually Live
Open Settings on your iPhone running iOS 26. With AirPods connected, their name appears right at the top of the main Settings screen, directly beneath your Apple Account. Tap it. That is home base. Apple moved this placement higher in iOS 26, and it is a genuine improvement — you no longer have to scroll down to Bluetooth and hunt for a tiny info button.
Inside that panel you get the basics: your AirPods’ name (tap to rename), firmware version, serial number, and a toggle called Connect to This iPhone. Set that to “Automatically” if this is your primary phone. Set it to “When Last Connected to This iPhone” if you share AirPods between an iPhone and an iPad and want to control which device grabs them.
Noise Control Has More Layers Than You Think
If you own AirPods 4 with ANC, AirPods Pro, or AirPods Max, your settings panel includes a Noise Control section. You choose which modes the press-and-hold gesture (or the noise control button on AirPods Max) cycles through: Active Noise Cancellation, Transparency, Adaptive Audio, or Off. I disable Off entirely, because landing on a mode that gives you neither noise cancellation nor transparency is just confusing.
AirPods Pro 2 and Pro 3 also get three sub-settings that other models skip. Conversation Awareness lowers media volume and boosts voices when someone speaks to you. Personalized Volume adjusts playback based on your environment over time. And an Adaptive Audio slider lets you fine-tune how much outside sound bleeds through. If Adaptive Audio feels too isolating or too leaky, start with this slider before switching modes. Most AirPods Pro owners never touch it.
Gestures and Controls Worth Customizing First
Press and Hold is the single most customizable AirPods setting, and it defaults to Noise Control on both ears. You can reassign each ear independently. My setup: left ear toggles noise control, right ear activates Siri. This eliminates accidentally triggering Siri when I meant to switch to Transparency, which happened constantly when both ears did the same thing.
iOS 26 also lets you configure how you end calls and mute calls: single press or double press. Set End Call to double-press. I cannot count how many times I accidentally hung up on someone by pressing once to pause and the phone interpreting it as ending the call. Double-press is safer. Single-press for Mute works fine because an accidental mute is less catastrophic than an accidental hangup.
There is a setting Apple barely publicized: Camera Control. AirPods with an H2 chip can trigger your iPhone camera shutter from the stem. Set it to Press Once for quick shots or Press and Hold for a deliberate trigger. Handy for group photos where the phone is propped up across the room. Not available on AirPods Max.
 Ad
AdSpatial Audio Deserves Your Full Attention
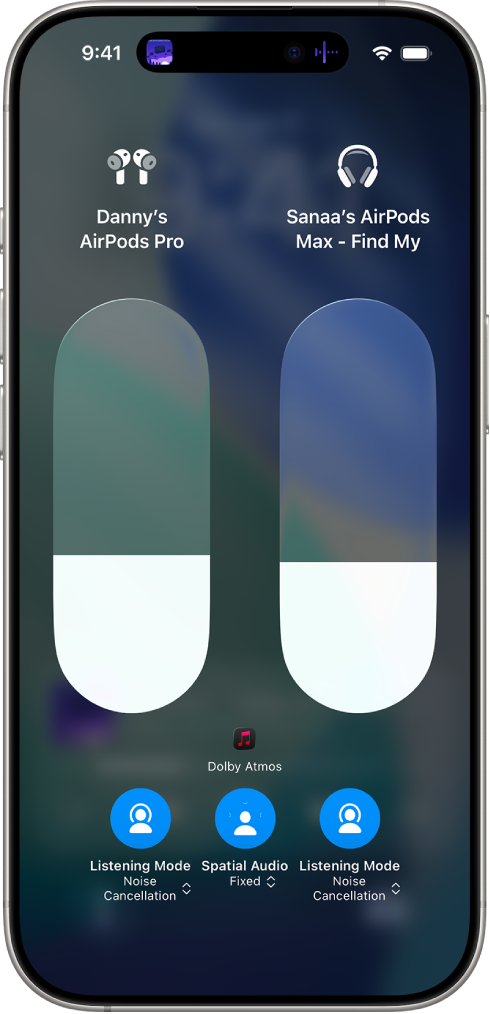
Every current AirPods model supports Spatial Audio. In the Control Center, long-press the volume slider while your AirPods are connected. Three options: Off, Fixed, and Head Tracked. Fixed anchors sound to your AirPods. Head Tracked anchors it to your iPhone, so audio stays positioned relative to the device when you turn your head. For movies, Head Tracked is remarkable. For walking with a podcast, Fixed is better because you do not want the soundstage shifting every time you glance sideways.
Run Personalized Spatial Audio if you have not already. Settings, your AirPods, Personalized Spatial Audio, and scan your ears with the TrueDepth camera. Takes 30 seconds per ear. The difference is subtle on music but noticeable on dialogue, where voices sit more naturally in front of you instead of somewhere vaguely above your head. If spatial audio has always sounded off, the calibration scan is probably what you have been missing.
Hearing Health Is an AirPods Pro Exclusive
AirPods Pro 2 and Pro 3 include an FDA-authorized hearing test and clinical-grade hearing aid functionality. Tap Hearing Health inside your AirPods settings. The test takes five minutes, plays tones in a quiet room, and stores an audiogram in the Health app. Based on the results, Hearing Assistance turns your AirPods Pro into a personalized hearing aid. Hearing Protection is on by default and monitors real-time decibel levels — according to Apple’s support documentation, it adjusts dynamically across all listening modes. Leave it on. AirPods Pro 3 exclusively adds in-ear heart rate monitoring during workouts.
The Audio Customization Buried in Accessibility
Under Settings, Accessibility, Audio & Visual, there is Headphone Accommodations. Turn it on and tap Custom Audio Setup. Your iPhone plays comparison samples and builds a sound profile matched to your hearing. This is not an equalizer. It is a real hearing profile that adjusts tone and amplification, and the difference is most obvious on podcasts where voices suddenly have more presence.
AirPods Pro owners get extra Transparency Mode customization: amplification, balance, and tone for what Transparency lets through. If outside sounds feel harsh or tinny with Transparency active, these granular controls are the fix Apple tucked away.
Settings That Arrived Quietly in iOS 26
Apple added several AirPods settings in iOS 26 without fanfare:
- Pause Media When Falling Asleep — AirPods detect when you drift off and pause playback. I have woken up four episodes deep at 3 AM enough times to call this essential.
- Charging Reminders — Notifications for low case battery and full charge. Saves you from grabbing an empty case on the way out the door.
- Studio-Quality Recording — Record high-fidelity audio with Voice Isolation using AirPods mics. Works in Voice Memos and third-party apps. Requires H2 chip.
- Live Translation — Real-time conversation translation in English, French, German, Portuguese, and Spanish. More languages coming. Requires H2 chip.
- Keep Audio with Headphones — Buried under Settings, General, AirPlay & Continuity. Stops audio from auto-jumping to a car stereo or Bluetooth speaker when you connect. If your music randomly switches devices, this is the fix.
That sleep detection deserves a special mention. It uses motion sensors to recognize the stillness pattern of someone falling asleep. If you ever use AirPods at bedtime, turn it on — waking up disoriented with a podcast still playing is not a good time.
Key settings comparison across current AirPods models in iOS 26. AirPods Max supports noise cancellation and Spatial Audio but lacks the in-ear sensor features available on Pro and AirPods 4 models.
| Setting | AirPods 4 (ANC) | AirPods Pro 3 | AirPods Max |
|---|---|---|---|
| Adaptive Audio | Yes | Yes | No |
| Hearing Health | No | Yes | No |
| Camera Control | Yes | Yes | No |
| Head Gestures | No | Yes | No |
| Sleep Detection | Yes | Yes | No |
| Personalized Spatial Audio | Yes | Yes | Yes |
The Four Changes That Take Two Minutes
Connect your AirPods. Open Settings. Tap your AirPods name at the top. Check these four things:
- Reassign Press and Hold so each ear does something different. Left for noise control, right for Siri works well.
- Set End Call to double-press to stop accidental hangups.
- Run Personalized Spatial Audio. Settings, your AirPods, Personalized Spatial Audio. Thirty seconds per ear.
- Run Custom Audio Setup under Accessibility, Audio & Visual, Headphone Accommodations. Your AirPods will genuinely sound different afterward.
Two minutes. Four changes. Your AirPods will feel like a different product. Apple packed serious capability into these earbuds and then scattered it across half a dozen menus. Now you know where everything is.

Related Posts
Your AirPods Max Are Collecting Grime You Cannot See
Mar 04, 2026
Your AirPods Have Three Spatial Audio Modes You Probably Never Switched
Mar 03, 2026
AirPods Pro 3 vs Galaxy Buds 4 Pro: Which Earbuds Sound Better for Your Money
Mar 02, 2026