
Every AirPods model pairs with iPhone, iPad, Mac, Apple Watch, and Apple TV, and the whole process takes less than two minutes when you know the right steps for your specific model. AirPods 4 and AirPods Pro 3 introduced a new capacitive touch area on the front of the charging case that replaces the physical setup button found on older models, so the pairing gesture you learned on your last pair may not apply to your current one. This guide walks through auto-pairing, manual pairing, the new double-tap method, device switching, troubleshooting, and factory resets for every AirPods generation currently sold or in circulation.
Key Takeaways
- Open the AirPods case next to your unlocked iPhone to trigger the automatic setup animation; tap Connect and you are done.
- AirPods 4 and AirPods Pro 3 use a double-tap on the front of the case to enter pairing mode; older models use the press-and-hold button on the back.
- AirPods paired with one Apple device automatically appear on every other device signed into the same Apple Account.
- To force a factory reset on AirPods 4 or AirPods Pro 3, close the lid for 30 seconds, open it, then double-tap the front of the case three times.
- Older AirPods reset by pressing and holding the rear button for 15 seconds until the LED flashes amber, then white.
- Run the Acoustic Seal Test in Settings on AirPods Pro 3 (or the Ear Tip Fit Test on AirPods Pro 2) to confirm a proper fit after pairing.
Quick-Verdict: Which Pairing Method Do I Need?
The following table compares pairing methods across current AirPods models. The two newest models share the same capacitive double-tap gesture, while everything older still relies on the physical button.
| Model | Pairing Gesture | Case Button Location | Reset Method |
|---|---|---|---|
| AirPods Pro 3 | Double-tap front of case | Front (capacitive, invisible) | Double-tap front 3 times |
| AirPods 4 (both models) | Double-tap front of case | Front (capacitive, invisible) | Double-tap front 3 times |
| AirPods Pro 2 | Press and hold rear button | Back (physical) | Hold rear button 15 seconds |
| AirPods 3 | Press and hold rear button | Back (physical) | Hold rear button 15 seconds |
| AirPods Max | Press and hold noise control button | Right ear cup (physical) | Hold noise control + Digital Crown |
Auto-Pairing With iPhone and iPad
The fastest way to pair any AirPods model is the automatic setup animation that Apple builds into iOS and iPadOS. Make sure your device is running the latest version of its operating system and that Bluetooth is enabled in Settings. Unlock your iPhone or iPad, open the AirPods charging case with both earbuds inside, and hold it within a few inches of the screen. A card slides up from the bottom asking you to Connect. Tap it, follow any on-screen prompts for features like Siri and Announce Notifications, and tap Done.
One thing that catches people off guard: the animation relies on proximity and Bluetooth Low Energy, so it genuinely needs the case held close to the device. Resting the case on a desk across the room will not trigger it. If you have AirPods Pro 3, you will also be prompted to choose your ear tip size and can run the new Acoustic Seal Test (which replaced the older Ear Tip Fit Test) right from Settings after pairing. Apple notes that AirPods Pro 3 owners tend to size down compared to previous generations, so try the next smaller tip if the medium feels loose. The Apple AirPods Pro 3 technical specifications page confirms these earbuds carry an IP57 dust and water resistance rating, making ear tip swaps during a workout break perfectly safe.
Once paired with your iPhone, your AirPods automatically register with every other Apple device signed into the same Apple Account through iCloud. Your Mac, iPad, Apple Watch, and Apple TV will all show the AirPods as an available audio output without any extra configuration. If you have already explored other AirPods features, the guide to Conversation Awareness on AirPods Pro explains how to fine-tune what happens when your earbuds detect you speaking to someone nearby.
The New Double-Tap Pairing Gesture on AirPods 4 and AirPods Pro 3
Apple removed the physical setup button from the back of the charging case on both AirPods 4 (including the Active Noise Cancellation model) and AirPods Pro 3. In its place is an invisible capacitive touch zone on the front of the case, directly below where the status light glows. The status light itself is hidden beneath the plastic shell when the case is closed, which gives the case a cleaner look but means you need the lid open to interact with the touch zone.
To manually enter pairing mode on these newer models, place both earbuds in the case and open the lid. Then double-tap the front center of the case, right where the LED sits. The status light will flash white, signaling that the AirPods are discoverable. From here, go to Settings, then Bluetooth on any Apple device (or the Bluetooth settings on a non-Apple device) and select your AirPods from the list.
The double-tap feels similar to tapping on a trackpad, not a screen. You need a firm, deliberate tap; a light brush will not register. I found that using the pad of my index finger rather than the tip gave a more consistent response. That slight learning curve is worth noting because anyone coming from AirPods Pro 2 or AirPods 3 will instinctively reach for the back of the case looking for a button that no longer exists.
Join The Inner Circle For Serious Apple Users
Exclusive Apple tips. Free to join.
Manual Pairing for Older AirPods Models
AirPods (1st, 2nd, and 3rd generation), AirPods Pro (1st and 2nd generation), and AirPods Max all retain a physical button for manual pairing. The process is straightforward. Place both earbuds in the charging case and open the lid. Locate the small circular button on the back of the case, near the bottom. Press and hold that button until the status light flashes white. On AirPods Max, the equivalent action is pressing and holding the noise control button on the right ear cup for about five seconds until the light flashes white.
With the light flashing, navigate to Settings, then Bluetooth on your Apple device, or to System Settings, then Bluetooth on your Mac. Your AirPods will appear in the Nearby Devices section. Tap or click Connect and they are paired.
A useful detail: AirPods Max with the USB-C connector can also pair by simply plugging a USB-C cable from the headphones into an iPhone, iPad, or Mac. With Bluetooth enabled on the connected device, the pairing completes automatically. This wired-first pairing method was introduced alongside macOS 15.4 and iOS 18.4, so make sure your software is current.
Switching AirPods Between Devices
Once paired to one Apple device, AirPods use iCloud to sync across your ecosystem. Automatic switching is supposed to route audio to whichever device you are actively using, but the reality is messier. Sometimes the AirPods latch onto your iPad playing a paused YouTube video while you are trying to take a call on your iPhone. The quickest fix is opening Control Center on the device you actually want to use, tapping the AirPlay icon in the audio card, and selecting your AirPods manually. On a Mac, click the Sound icon in the menu bar and choose the AirPods from the output list.
You can also disable automatic switching entirely for specific devices. Go to Settings, then Bluetooth, tap the info icon next to your AirPods, and change "Connect to This iPhone" (or iPad, or Mac) from "Automatically" to "When Last Connected to This iPhone." This forces the AirPods to stay on the device where you last used them until you manually switch. For anyone who works across a Mac and an iPhone simultaneously, this single toggle eliminates the most common AirPods frustration.
Troubleshooting When Pairing Fails
Bluetooth devices are not perfect, and AirPods occasionally refuse to show the setup animation or connect. Here is a sequence of fixes, ordered from least disruptive to most.
First, confirm both earbuds are seated properly in the case and that the case has charge. A depleted case cannot broadcast the pairing signal. Close the lid, wait 15 seconds, and open it again. This brief reset cycle clears most transient glitches.
Second, toggle Bluetooth off and back on in Settings. On iPhone and iPad, use the Settings app rather than Control Center; the Control Center toggle merely disconnects current Bluetooth devices without fully cycling the radio.
Third, if the AirPods appear in your Bluetooth list with a "Not Connected" label, tap the info icon next to them and choose "Forget This Device." Then re-pair from scratch using either the auto-pair animation or the manual method for your model.
Fourth, for persistent issues on AirPods 4 or AirPods Pro 3, try a factory reset: close the lid, wait 30 seconds, open it, then double-tap the front of the case three times. You will see the status light flash in a sequence (white, faster white, then amber followed by white). This wipes the pairing data and returns the AirPods to their out-of-box state. For older models, press and hold the rear setup button for about 15 seconds until the LED cycles from amber to white. After a reset, the auto-pair animation should appear when you open the case near your iPhone.
A less obvious cause of pairing failure is an AirPods firmware mismatch. AirPods update their firmware automatically when placed in the case, connected to a device, and near a Wi-Fi network. You can check the current firmware version in Settings, then Bluetooth, by tapping the info icon next to your AirPods and looking at the Firmware Version field. If it seems out of date, leave the case open and plugged in near your iPhone overnight; the update should install.
Affiliate disclosure: some links in this article are Amazon Associate links. If you buy through them, Zone of Mac may earn a small commission at no extra cost to you, and we only recommend products that genuinely bring value to your Apple setup.
Protecting Your Case While You Sort Out Pairing
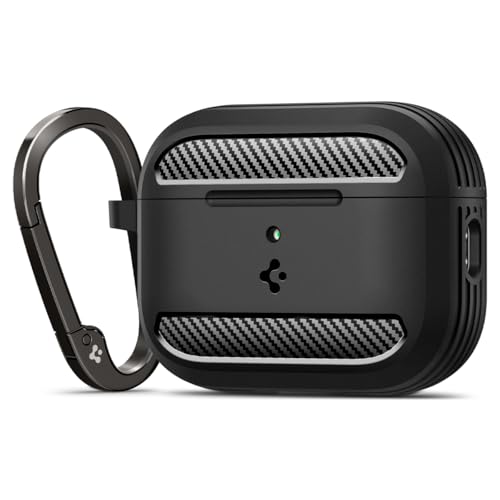
The new capacitive touch zone on AirPods Pro 3 and AirPods 4 is built into the smooth plastic front of the case, which also happens to be the part that hits the ground first when the case slips out of a pocket. A cracked or deeply scratched front panel could affect both the status light visibility and the touch sensor's responsiveness. The Spigen Rugged Armor case for AirPods Pro 3 wraps the charging case in a flexible silicone shell with raised edges around the front panel and the hinge. It maintains full access to the double-tap zone and the USB-C port, supports wireless and MagSafe charging without removal, and includes a carabiner for clipping to a bag. The carbon-fiber texture on the back panel adds grip in a way that the bare glossy case simply does not offer, and the slight added bulk actually makes the case easier to fish out of a coat pocket by feel alone.
You can get the Spigen Rugged Armor for AirPods Pro 3 here: https://www.amazon.com/dp/B0FCV8KYYK?tag=zoneofmac-20
Pairing With Apple Watch and Apple TV
AirPods that are already paired to your iPhone will appear automatically on a paired Apple Watch. Open the Settings app on your Apple Watch, tap Bluetooth, and your AirPods should be listed. Tap them to connect. If they do not appear, make sure both the Watch and the iPhone it is paired with are running the latest software.
For Apple TV 4K or Apple TV HD, go to Settings, then Remotes and Devices, then Bluetooth. Put your AirPods in pairing mode using the method for your model (double-tap for AirPods 4 and AirPods Pro 3, press-and-hold for older models), and select them from the list. Apple TV also supports connecting two sets of AirPods simultaneously through the Share Audio feature, which is worth knowing if you want to watch a movie with someone without waking up the rest of the house. The AirPods Max audio guide covers how the over-ear model handles spatial audio on Apple TV specifically.
Accessibility and Clarity
AirPods pairing is largely accessible out of the box. The setup animation on iPhone includes VoiceOver support, so a visually impaired user hears spoken prompts describing each step. The status light on the case provides visual confirmation of pairing mode (flashing white) and reset status (amber then white), but this information is also conveyed through VoiceOver announcements when the iPhone is nearby. One gap: the new capacitive double-tap zone on AirPods 4 and AirPods Pro 3 has no tactile marker distinguishing it from the rest of the case front. Users who rely on touch to locate controls will need to feel for the center of the case below the hinge, approximately where the lid meets the body. A protective case with a raised ridge around that zone can make it easier to find by feel.
For users with motor limitations, the press-and-hold gesture on older models requires sustained pressure for 5 to 15 seconds, which can be tiring. The newer double-tap gesture is faster and requires less force, making it an ergonomic improvement. Additionally, the Acoustic Seal Test on AirPods Pro 3 gives spoken audio feedback through the earbuds themselves, confirming seal quality without needing to read the screen. Apple's Accessibility support documentation for AirPods lists features like Live Listen, headphone accommodations, and custom audio setups that benefit users with hearing differences.
Quick-Action Pairing Cheat Sheet
Auto-pair (all models): Open case near unlocked iPhone. Tap Connect. Done.
Manual pair, AirPods Pro 3 / AirPods 4: Open lid. Double-tap front of case. Light flashes white. Select in Bluetooth settings.
Manual pair, older AirPods: Open lid. Press and hold button on back of case. Light flashes white. Select in Bluetooth settings.
Manual pair, AirPods Max: Press and hold noise control button 5 seconds. Light flashes white. Select in Bluetooth settings.
Factory reset, AirPods Pro 3 / AirPods 4: Close lid 30 seconds. Open lid. Double-tap front 3 times. Light flashes amber then white.
Factory reset, older AirPods: Open lid. Hold rear button 15 seconds. Light flashes amber then white.
Check firmware: Settings, then Bluetooth, then info icon next to AirPods, then Firmware Version.

Related Posts
Your AirPods Work with Android — Here’s What Apple Holds Back
Apr 10, 2026
Your AirPods Are Collecting Grime That’s Killing Your Sound
Apr 09, 2026
Your AirPods Have a FaceTime Trick That Changes Group Calls
Apr 02, 2026