The Photos App Is More Powerful Than Your Current System
Apple Photos in macOS Tahoe is a full organizational toolkit that handles tagging, facial recognition, location mapping, and automatic grouping across tens of thousands of images. The real question is not whether the app can organize your library, but which combination of its tools fits the way you actually take and revisit photos. A person who shoots 50 photos a week needs a different system than someone importing 2,000 RAW files from a weekend trip, and the default setup serves neither of them well.
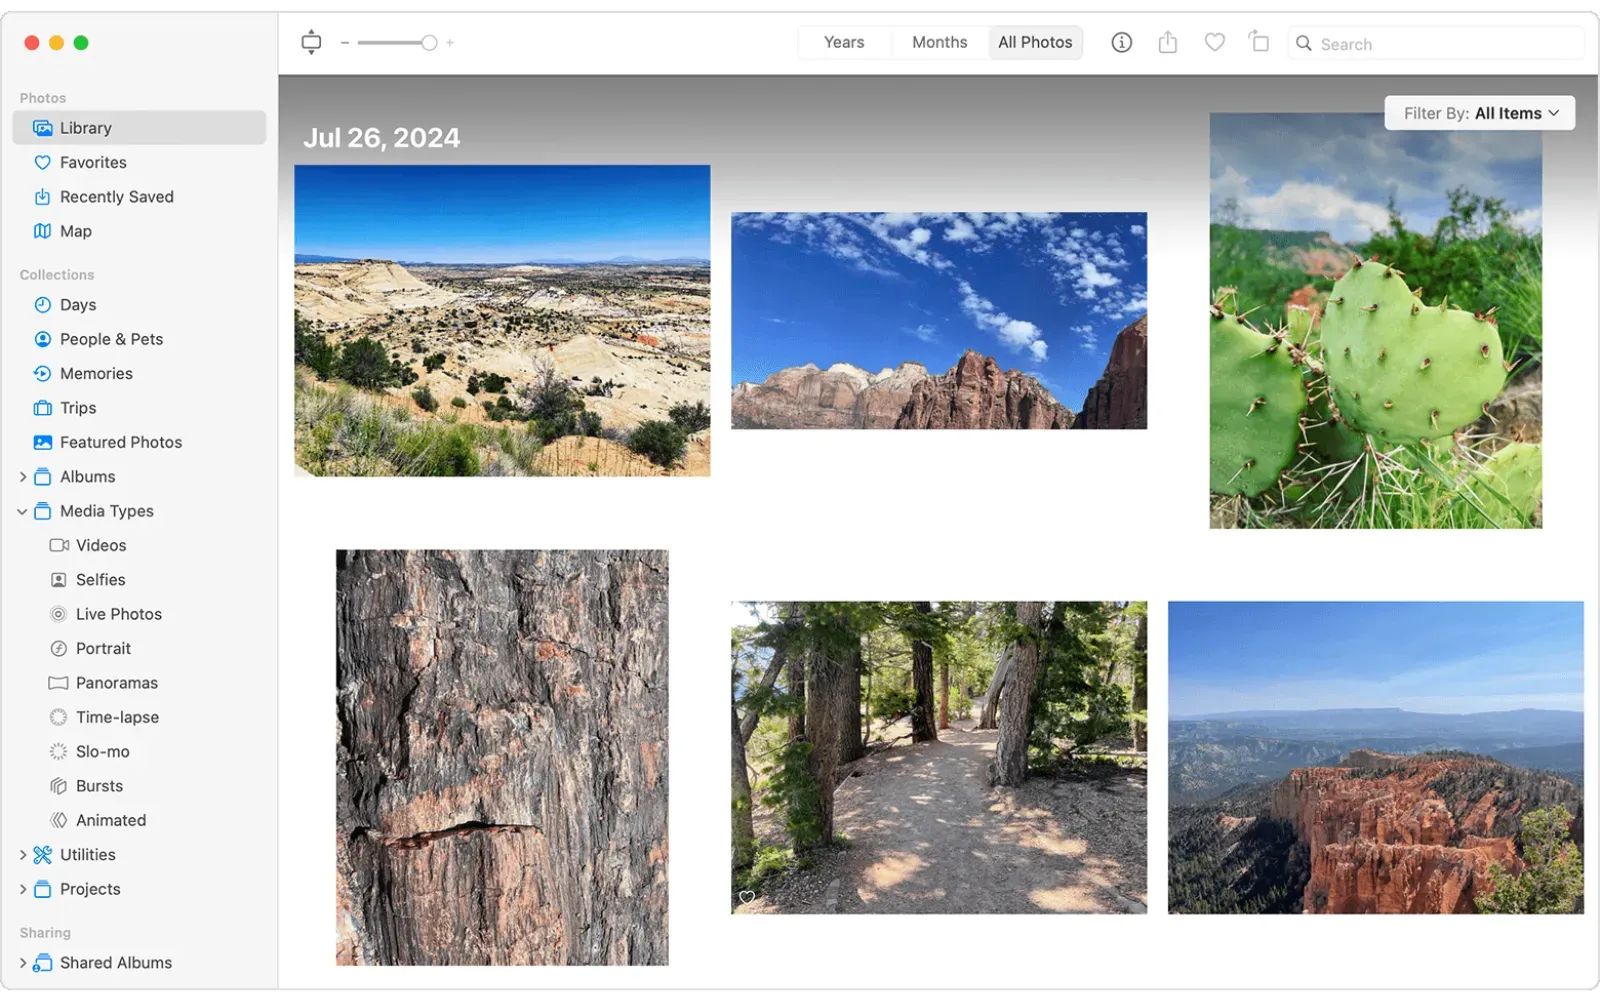
The app splits into two distinct modes: Library and Collections. Library shows every image in a single chronological scroll. Collections break your photos into automatic and manual groupings like Memories, Trips, People & Pets, and Albums. Knowing when to browse in Library mode versus when to navigate through Collections is the difference between scrolling endlessly and finding exactly what you need in seconds. I want to walk you through both, starting with the tools most people skip entirely.
Smart Albums Do the Sorting You Will Never Do Manually
Smart Albums are the single most underused feature in Photos for Mac. They work like saved searches that update automatically as new photos match your criteria. The setup takes about two minutes per album, and the payoff compounds every time you import new images.
To create one, open Photos, go to File, then New Smart Album. A dialog box appears with a three-part condition builder: a category dropdown, a relationship operator (is, is not, contains, starts with), and a value field. Start simple: set the category to “Photo” and the condition to “is favorite.” That single Smart Album collects every photo you have ever hearted, across your entire library, and it updates itself the moment you favorite a new shot.
Where Smart Albums get genuinely powerful is in stacking conditions. Click the plus button to add more rules. Set the Match dropdown to “All” (meaning every condition must be true) or “Any” (meaning at least one condition must be true). A practical example: create a Smart Album where the photo is a Portrait AND the date is within the last 30 days. You now have a self-refreshing collection of recent portrait shots, no manual dragging required.
Four Smart Albums worth creating on day one: “Recent Favorites” (Photo is Favorite AND Date is in the last 90 days), “Screenshots to Delete” (Photo is Screenshot AND Date is older than 30 days), “Untagged Photos” (Keyword does not contain any value), and “Large Files” (File Size is greater than 10 MB). That last one matters more than you think when your library starts eating into your startup disk.
One limitation to keep in mind: Smart Albums created on your Mac do not sync to Photos on your iPhone or iPad. They live exclusively on the Mac where you built them. According to Apple’s Photos User Guide, this is a deliberate design constraint, not a bug. Standard albums sync across devices via iCloud Photo Library; Smart Albums do not.
Keywords Are the System That Scales
Albums group photos by event or theme. Keywords group photos by what is actually in them. The distinction matters once your library crosses roughly 5,000 images, because at that point you stop remembering which album contains which shot, and search becomes your primary navigation tool.
To add keywords, select one or more photos, go to Window, then Info (or press Command-I). Click the “Add a keyword” field and type. You can assign multiple keywords to a single photo: “Beach,” “Sunset,” “2024,” “California.” Photos treats each keyword as a searchable tag, meaning you can later type “Beach Sunset” into the search bar and find every image that carries both keywords, regardless of which album it sits in.
The discipline is in building a consistent vocabulary. Do not use “Beach” on some photos and “Shore” on others. Pick one term and stick with it. A useful starting set: location names (cities or landmarks), people present (when People & Pets has not identified them automatically), event types (wedding, birthday, hike, concert), and gear used (iPhone 17, drone, film scan).
Batch keyword assignment is what makes this practical at scale. Select 200 photos from a trip, press Command-I, type your four keywords, and all 200 photos are tagged in one action. That two-minute investment pays off every time you search for the next five years.
If you are importing photos from your iPhone, pairing a keyword system with these iPhone Photos tricks that complement your Mac library gives you a workflow that spans both devices.
People & Pets Recognition Builds Itself Over Time
Affiliate disclosure: some links in this article are Amazon Associate links. If you buy through them, Zone of Mac may earn a small commission at no extra cost to you, and we only recommend products that genuinely bring value to your Apple setup.
Photos identifies faces using on-device machine learning, as confirmed in Apple’s macOS Tahoe privacy documentation. No images leave your Mac for processing. Open the People & Pets collection from the sidebar, and you will see clusters of faces the app has detected but not yet named. Click a cluster, assign a name, and Photos retroactively scans your entire library to group every appearance of that person.
The recognition improves as you confirm or correct identifications. When Photos suggests two faces might be the same person, confirming the match trains the model. When it incorrectly groups two different people, splitting them teaches it the difference. After a few hundred confirmations, the system catches faces in group shots, low-light images, and even photos where the person is turned slightly away.
This feature extends to pets. A dog or cat that appears frequently in your library will surface as its own cluster. Name the pet, and Photos groups every appearance the same way it handles human faces.
When Your Library Outgrows Your Startup Disk
A base-model MacBook Air with Apple Silicon M4 ships with 256 GB of internal storage. A Photos library with 30,000 images and 500 videos can reach 150 GB without trying. Once your library crosses 60 percent of your total disk space, macOS Tahoe starts throttling background processes, Spotlight indexing slows down, and the entire system feels sluggish. The math simply does not work for photographers, families who record every holiday, or anyone who has been taking iPhone photos since 2015. If storage is already tight, you can reclaim hidden storage space in macOS Tahoe before adding an external drive.
Moving your Photos library to an external SSD solves this permanently. The process is straightforward but requires one rule: the external drive must use APFS or Mac OS Extended (Journaled) formatting. Do not use exFAT or NTFS. Open Photos, hold down the Option key while launching the app, and you will see a dialog asking you to choose a library. Click “Other Library” and navigate to the copy you placed on the external drive. Once it opens, go to Photos, then Settings, then General, and click “Use as System Photo Library” to make it your default. iCloud Photo Library works normally with an external library, as long as the drive is connected when Photos needs to sync.
The Samsung T9 Portable SSD handles this workflow without friction. The USB 3.2 Gen 2x2 interface delivers up to 2,000 MB/s read speeds, which means browsing a 150 GB library on the external drive feels identical to browsing one on internal storage. There is no loading delay when scrolling through thumbnails, and opening a full-resolution RAW file takes the same fraction of a second. The drive is rated for drops up to 3 meters, which matters when it lives in a laptop bag that gets tossed onto desks and airplane seats. At 2 TB, it holds a full photo library plus project files with room to grow. You can pick up the Samsung T9 Portable SSD 2TB on Amazon.
Pinned Collections and the Sidebar Layout That Saves Time
macOS Tahoe introduced Pinned Collections to the Mac Photos sidebar. These are the groupings you access most frequently, positioned at the top of the sidebar so you reach them without scrolling. Right-click any collection and select “Pin” to lock it in place. Right-click and “Unpin” to remove it.
A sidebar layout that works for most people: pin Favorites, Recent Days, and your two or three most active albums. Collapse everything else. The sidebar gets cluttered fast when every default collection is expanded, and the visual noise defeats the purpose of organizing in the first place.
The Collections view also includes automatic groupings that require zero setup. Memories uses location and date data to create curated slideshows. Trips groups photos by travel destinations. Media Types separates panoramas, portraits, Live Photos, screenshots, and videos into their own buckets. These automatic collections are useful for browsing but unreliable for specific retrieval. For finding a particular shot, keywords and Smart Albums are always faster.
Here is how the four core organizational tools in macOS Tahoe Photos compare for daily use.
| Tool | Setup Time | Auto-Updates | Syncs to iPhone | Best For |
|---|---|---|---|---|
| Albums | 30 seconds | No | Yes (via iCloud) | Event or trip grouping |
| Smart Albums | 2 minutes | Yes | No (Mac only) | Filtered views that refresh automatically |
| Keywords | 1-2 min per batch | N/A (manual tags) | Yes (via iCloud) | Cross-album search across entire library |
| People & Pets | Initial scan: auto | Yes | Yes (via iCloud) | Finding every photo of a specific person or pet |
Join The Inner Circle For Serious Apple Users
Exclusive Apple tips. Free to join.
Check your inbox for a confirmation link.
Something went wrong. Please try again.
Accessibility and Clarity
Photos in macOS Tahoe supports VoiceOver for navigating the sidebar, browsing thumbnails, and reading image descriptions. When VoiceOver is active, pressing VO-Space on a selected thumbnail reads any assigned caption or keyword tags aloud. Users who have added descriptive keywords to their photos get significantly more value from VoiceOver than those relying on the default empty metadata.
The app’s high-contrast mode, activated through System Settings then Accessibility then Display then Increase Contrast, sharpens the boundaries between sidebar sections and thumbnail borders. For users with low vision, this makes the difference between being able to visually parse a grid of 200 thumbnails and seeing a blur of colors. Smart Albums offer a cognitive accessibility advantage as well: instead of remembering which album holds what, you define the rules once and let the system maintain the organization. This reduces the mental load of managing a large library, which benefits users with ADHD or anyone who finds complex folder hierarchies overwhelming.
One friction point: the Smart Album condition builder uses small dropdown menus with limited contrast between selected and unselected states. Users who need larger interface elements should enable System Settings, then Accessibility, then Display, then Larger Text before building Smart Albums, as the dialog respects the system text size setting.
Quick-Action Checklist
- Open Photos, go to File, then New Smart Album. Create “Recent Favorites” with conditions: Photo is Favorite AND Date is in the last 90 days. Click OK.
- Create a second Smart Album called “Screenshots to Delete” with conditions: Photo is Screenshot AND Date is older than 30 days. Click OK. Review and delete periodically.
- Select 50 recent photos. Press Command-I. Add at least two keywords (location and event type) to each batch.
- Open the People & Pets collection. Name the top five face clusters. Confirm or split suggested matches to improve accuracy.
- Right-click Favorites, Recent Days, and your most active album in the sidebar. Select Pin for each. Collapse all other sections.
- If your library exceeds 100 GB, copy Photos Library.photoslibrary from your Pictures folder to an APFS-formatted external SSD. Hold Option while launching Photos, select the external copy, and click Use as System Photo Library in Settings.
- Open System Settings, then General, then Time Machine. Verify the external SSD is included in your backup scope.

Tori Branch
Hardware reviewer at Zone of Mac with nearly two decades of hands-on Apple experience dating back to the original Mac OS X. Guides include exact settings paths, firmware versions, and friction observations from extended daily testing.
Related Posts
Seven Mac Accessories That Turn a Good Desk Into a Great One
Apr 10, 2026
Your Mac Has a Networking Time Bomb That Only a Reboot Defuses
Apr 09, 2026
Your Mac Feels Slow After macOS Tahoe — Here’s What Actually Fixes It
Apr 08, 2026