Updated January 28, 2026 at 4:14PM EST to reflect the new AirTag 2nd Generation.
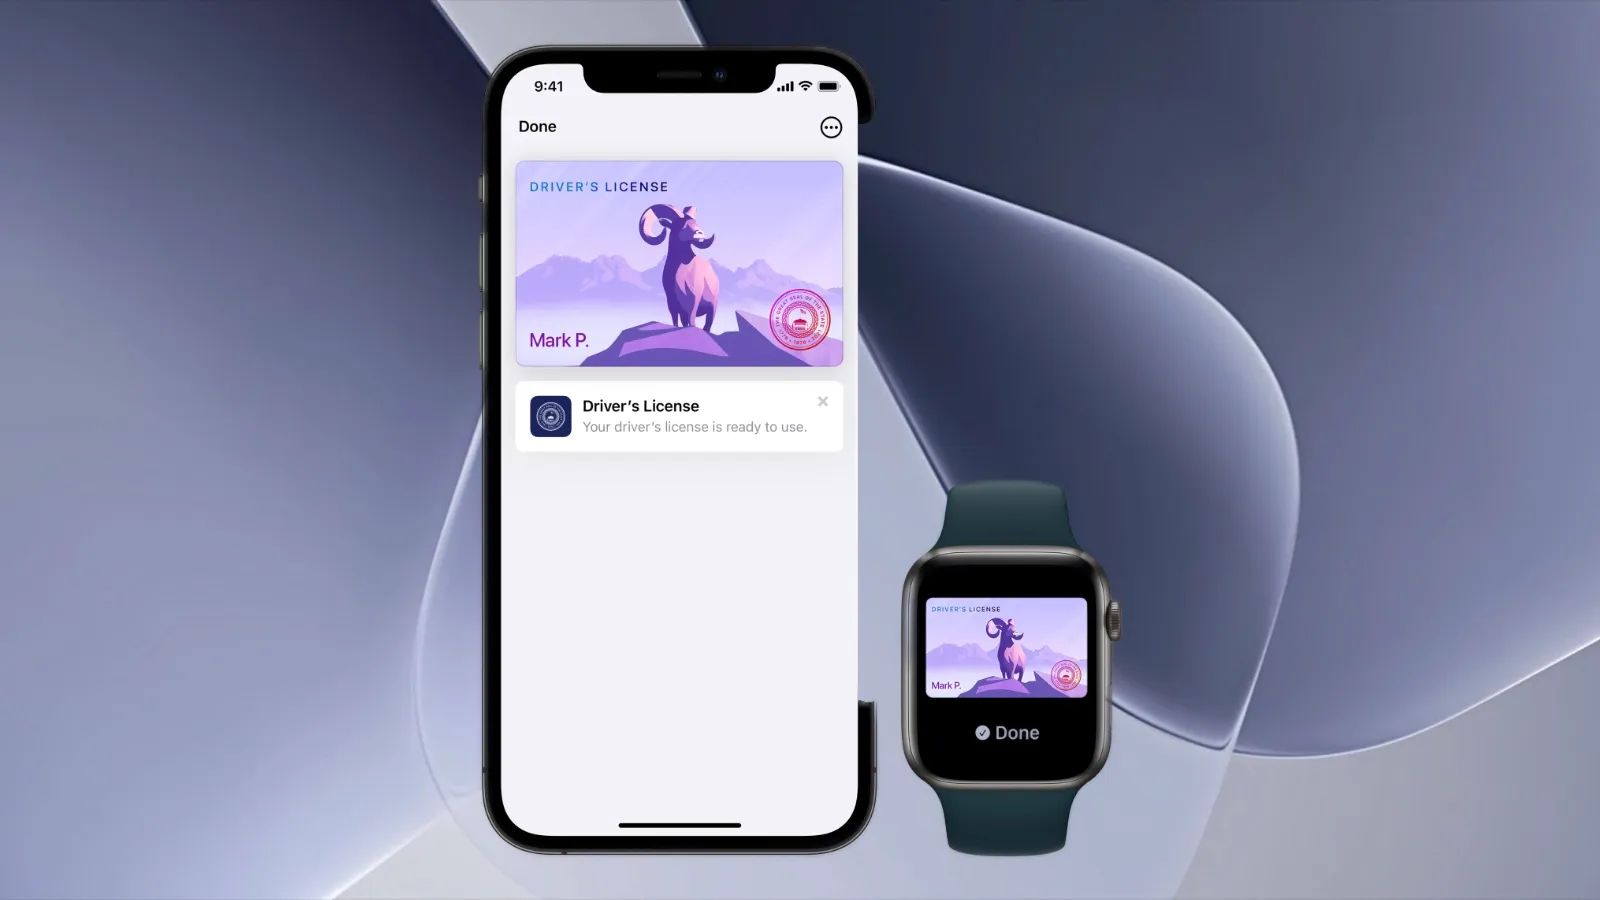
Apple Wallet on iPhone can store your driver's license or state ID, giving you a secure way to verify your identity without pulling out your physical card. The feature works at TSA checkpoints in participating airports and is expanding to more states throughout 2026. I'll walk you through exactly how to add your ID, which states currently support this feature, and what to expect when using it in real-world scenarios.
Key Takeaways
- Open the Wallet app and tap the Add button to start adding your driver's license or state ID
- You'll need to scan your physical ID and complete a facial verification using your iPhone's camera
- Digital IDs currently work at TSA checkpoints in over 30 participating airports
- Your ID data is encrypted and stored in the Secure Element on your iPhone
- You can present your digital ID using Face ID or Touch ID authentication
- Keep your physical ID as backup since digital IDs aren't accepted everywhere yet
At-A-Glance: Digital ID vs Physical ID
| Feature | Digital ID in Apple Wallet | Physical Driver's License |
|---|---|---|
| TSA Airport Use | Supported at 30+ airports | Universal acceptance |
| Setup Time | 5-10 minutes | None |
| Authentication | Face ID or Touch ID required | Visual inspection |
| Lost Card Recovery | Instant access on iPhone | Replacement wait time |
| Accessibility | VoiceOver compatible | Varies by state design |
How to Add Your Driver's License to Apple Wallet
The setup process takes about five to ten minutes and requires your physical driver's license or state ID. Open the Wallet app on your iPhone and tap the plus button in the upper-right corner. Select "Driver's License or State ID" from the list of options.
Your iPhone will prompt you to position your physical ID in the camera frame. Hold it steady while the camera captures the front of your card. You'll repeat this process for the back of your card. The app uses optical character recognition to extract your information automatically.
Next comes the identity verification step. Your iPhone will guide you through a series of facial movements and expressions to confirm you're the person on the ID. This typically involves turning your head slightly or smiling. The process feels similar to setting up Face ID for the first time.
After verification completes, your state's motor vehicle department reviews the submission. Most approvals happen within minutes, though some states may take up to a few hours. You'll receive a notification when your digital ID is ready to use.
Affiliate disclosure: some links in this article are Amazon Associate links. If you buy through them, Zone of Mac may earn a small commission at no extra cost to you, and we only recommend products that genuinely bring value to your Apple setup.
Which States Support Apple Wallet IDs
As of January 2026, the following states have launched driver's license support in Apple Wallet: Arizona, California, Colorado, Georgia, Hawaii, Iowa, Maryland, Ohio, and Utah. Several additional states are actively working on implementation, including Connecticut, Kentucky, Mississippi, Oklahoma, and Puerto Rico.
The rollout timeline varies significantly by state. Some states that announced support in 2024 are still completing their technical integration with Apple's identity verification systems. Check your state's Department of Motor Vehicles website for the most current status on digital ID availability. You can also find updated information in Apple's official support documentation for IDs in Wallet.
Join The Inner Circle For Serious Apple Users
Exclusive Apple tips. Free to join.
Using Your Digital ID at TSA Checkpoints
At participating airports, you'll find designated lanes with readers that accept digital IDs. Tap your iPhone or Apple Watch near the identity reader. Your device will display a summary of what information the reader is requesting. You then authenticate with Face ID or Touch ID to share only the necessary data.
The experience differs from handing over a physical card. The TSA agent doesn't handle your device. The reader communicates wirelessly with your iPhone, and you maintain control throughout the process. The information shared is limited to what's required for the specific verification.
For anyone with visual impairments, VoiceOver provides full narration of the verification process. The interface describes each step clearly, from what information is being requested to confirmation that the transaction completed successfully. This represents a meaningful improvement over trying to read small text on a physical card under fluorescent airport lighting.
Carry Your Essentials Without the Bulk
Going digital with your ID opens the door to carrying less in your pockets. A slim MagSafe wallet paired with your iPhone creates a minimal carry setup that still keeps a backup card accessible. The MOFT MagSafe Wallet snaps onto the back of any iPhone 12 or newer and folds into a stand when you need hands-free viewing. At just 5mm thick, it holds two cards without adding noticeable bulk. The origami-style design means you get both a wallet and a phone stand from a single accessory that weighs barely anything. The vegan leather exterior resists stains and ages well with daily use.


Buy the MOFT MagSafe Wallet Stand for iPhone jere (Amazon affiliate link) https://www.amazon.com/dp/B08P6SVDQB?tag=zoneofmac-20
Protecting Your Physical Belongings
While your driver's license lives safely in Apple Wallet, your traditional wallet containing backup cards can still go missing. An Apple AirTag 2nd Generation 4-Pack lets you track your wallet, keys, backpack, and luggage using the Find My network. Drop one AirTag 2 in your backup wallet and another in your travel bag. If either gets separated from you, the Find My app shows its last known location. With hundreds of millions of Apple devices in the network, lost items often surface quickly even when far from your phone. The AirTag 2's Precision Finding feature on iPhone 11 and newer uses Ultra Wideband technology to guide you directly to your item with visual and haptic feedback. Each AirTag 2 runs for about a year on a standard CR2032 battery that you can replace yourself.
Here's where to get the new 2nd Generation Apple AirTag 4-Pack https://www.amazon.com/dp/B0D54JZTHY?tag=zoneofmac-20
Privacy and Security Considerations
Your digital ID data stays encrypted within the Secure Element, the same hardware-protected chip that stores your Apple Pay credentials. The information never touches Apple's servers in an unencrypted form. When you authenticate at a TSA checkpoint or other reader, only the specific data requested gets transmitted.
Apple designed the system so you always see exactly what information is being requested before you approve the transaction. No one can pull data from your digital ID without your explicit Face ID or Touch ID authentication. If your iPhone is lost or stolen, you can remotely disable your digital ID through Find My.
Accessibility and Clarity
The digital ID feature includes thoughtful accessibility considerations that benefit users with various needs. VoiceOver reads every element of the ID display and verification process. The high-contrast interface works well for users with low vision. For those with motor limitations, the Face ID authentication removes the need to precisely position a physical card.
One area for improvement: the initial setup process involves holding your physical ID steady for camera capture, which can present challenges for users with tremor conditions or limited arm mobility. Having a family member assist with the initial scan resolves this, and the digital ID then becomes fully accessible for everyday use.
The cognitive load of using a digital ID is actually lower than managing physical cards. One fewer item to remember when leaving the house. One fewer thing to potentially drop or misplace at security. The system handles the complexity of secure authentication behind a simple tap-and-authenticate interaction.
Quick-Action Checklist
- Open Wallet app on your iPhone
- Tap the plus button in the upper-right corner
- Select "Driver's License or State ID"
- Position your physical ID in the camera frame
- Complete the facial verification prompts
- Wait for your state's approval notification
- Practice the authentication gesture before your next airport visit
- Keep your physical ID in your backup wallet for venues that don't yet accept digital IDs

Related Posts
iOS 26.4.1 Fixes the iCloud Bug That Broke Your Apps
Apr 09, 2026
iOS 26.4 Drains Your iPhone Battery. Here’s What Fixes It
Apr 09, 2026
Your iPhone Finally Lets You Create Custom Ringtones in iOS 26
Apr 08, 2026