Apple Photos on iPhone is a full photo management system with pinned collections, iCloud link sharing, shared libraries, and smart search built right in. The problem is that most of these tools sit behind icons and menus that the average user scrolls right past. Knowing where to tap changes the app from a disorganized camera roll into something that actually works the way your brain organizes memories.
What makes the difference between a cluttered Photos app and one that feels effortless comes down to a handful of settings buried in filter menus, collection views, and sharing options. Once you set them up, they stay that way. This is a one-time investment that pays off every time you open the app.
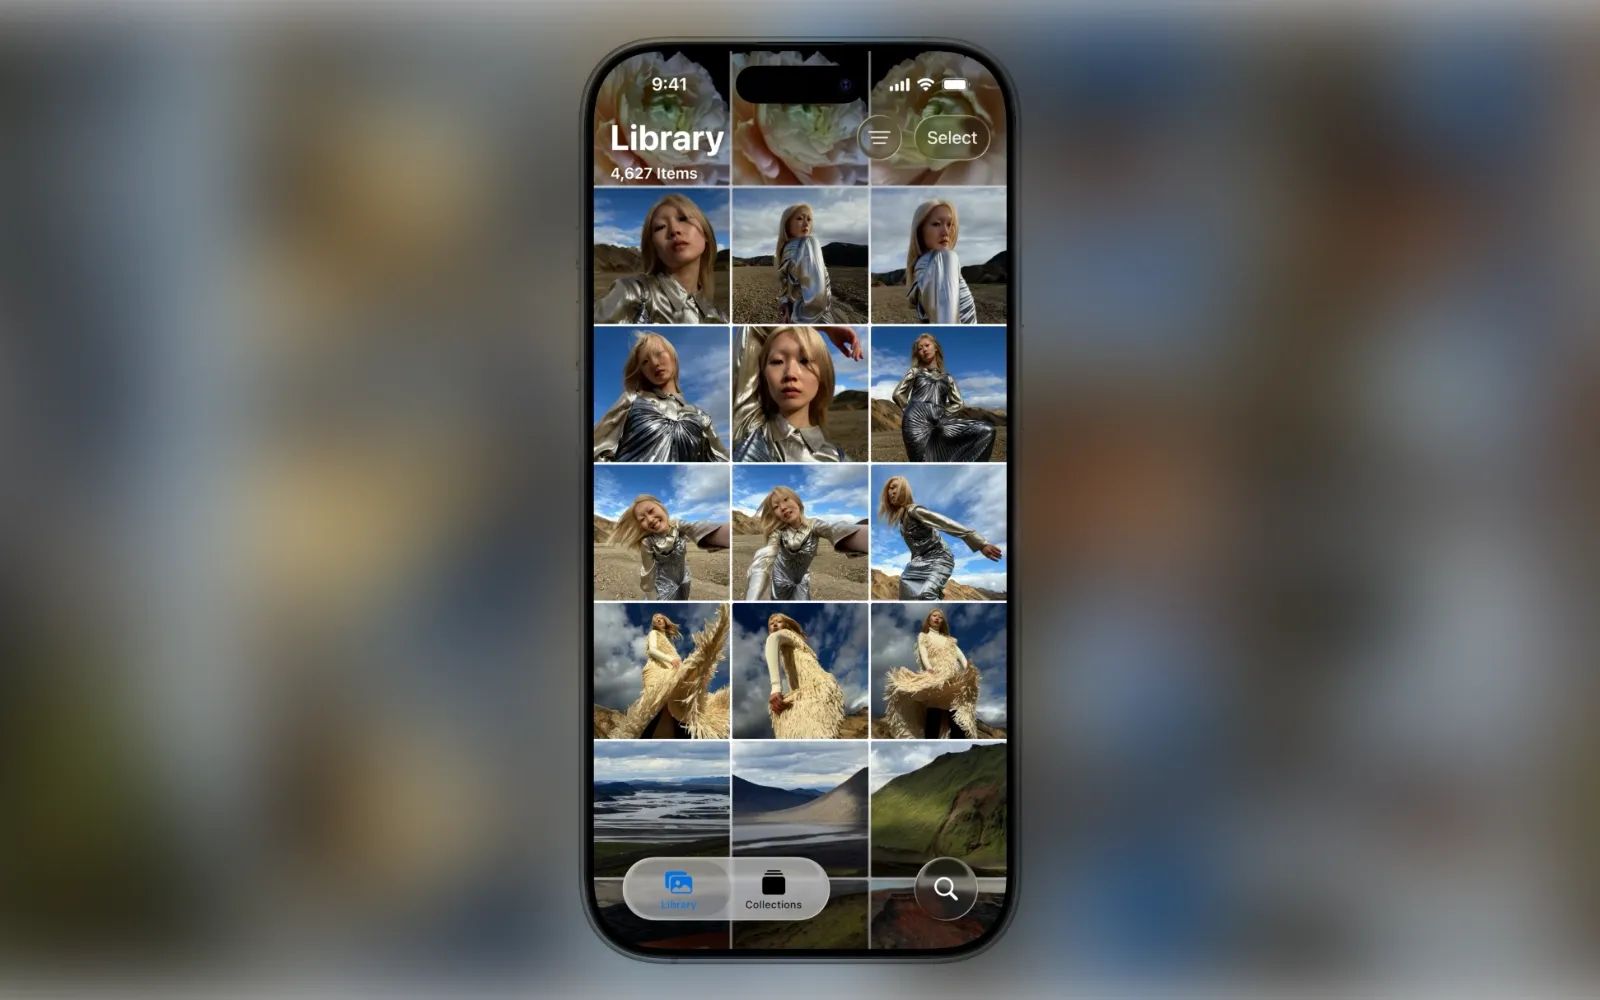
Sort and Filter Your Library Before You Do Anything Else
Open the Photos app and make sure you are in the Library view. Tap the filter icon in the top-right corner. Two options appear immediately: sort by Recently Added or Date Captured. Recently Added shows photos in the order they landed on your device, which is useful when you have just received images via AirDrop or iMessage. Date Captured organizes everything chronologically by when the photo was actually taken, regardless of when it arrived on your phone.
Below the sort options, tap Filter. This lets you narrow the library down to only Favorites, only Edited photos, or specific content types. Tapping Favorites, for instance, strips out everything except the photos you have deliberately starred. This is a fast way to build a mental shortlist without creating an album.
Tap View Options in the same menu. Here you can zoom the grid in or out, enable the aspect ratio grid (which shows each photo in its original proportions instead of cropping everything into uniform squares), and toggle whether screenshots or shared files appear in your main library. Turning off screenshots in the library view is the single fastest way to declutter your grid. Those screenshots still exist in the Screenshots album, so nothing is lost.
Pin Your Most-Used Collections to the Top
Switch to the Collections tab. At the top of the screen, you will see a Pinned section. Think of this as a dock for your Photos app. You can pin any album, person, trip, or collection here so it is always one tap away.
Tap Edit next to the Pinned heading. At the top, you will see what is already pinned. Use the minus icon to remove items, or drag the handle icon to reorder them. Scroll down to see suggested pins, and tap the plus icon to add them. At the very bottom, you can browse all your collections and albums to pin anything you want. I keep Map pinned permanently so I can browse photos by location without ever searching for a place name.
Scroll all the way down in the main Collections view and you can also reorder the collections tab itself. Hold the menu icon next to any collection, drag it to a new position, and tap Done. You can do the same thing by tapping the More button (the three-dot icon in the top-right corner), which also reveals layout options. Three layout icons let you choose whether top collections appear larger, whether all collections are uniform and small, or whether they are uniform and large. The Show All and Collapse All buttons open or close every collection at once.
Turn Off the Preview Banner That Nobody Asked For
Open any album. Tap the filter icon in the bottom-left corner, then tap View Options. Turn off Large Key Photo. That oversized preview image at the top of every album and collection disappears instantly. You reclaim that vertical space for actual thumbnails, which means less scrolling before you reach the photo you came for. While you are in that menu, you can also sort the album by Newest First or Oldest First, and apply the same content-type filters available in the main library.
Share Photos at Full Resolution with iCloud Links
Open any photo or video. Tap the Share button, scroll down, and select Copy iCloud Link. The link is copied to your clipboard, and you can paste it into any message, email, or social app. When the recipient opens that link, they see the photo or video at full resolution and can tap Save All to add it directly to their own library. No compression, no file-size warnings, no third-party app required.
iCloud links stay active for 30 days. To manage them, tap your profile photo in the Photos app. Under iCloud Links, you will see every link you have shared or received, along with the number of items in each link and how many days remain before it expires. Tap any link to review its contents or stop sharing it early.
One detail that catches people off guard: sharing photos can include metadata like GPS coordinates. Before you share, tap Options in the share sheet. From there, you can strip the location data, choose the file format (Automatic, Current, or Most Compatible), and decide whether to include the original file with its full edit history. If you are sending vacation photos to someone you do not know well, stripping the location is worth the extra tap. For a deeper look at protecting your data on iPhone, check out our guide to locking down privacy in iOS 26.3 settings.
Join The Inner Circle For Serious Apple Users
Exclusive Apple tips. Free to join.
Shared Albums vs. Shared Library: Which One Fits Your Situation
Affiliate disclosure: some links in this article are Amazon Associate links. If you buy through them, Zone of Mac may earn a small commission at no extra cost to you, and we only recommend products that genuinely bring value to your Apple setup.
Shared Albums are the older feature, and they are still useful for specific situations. To create one, tap Albums at the top of the Collections tab, switch to the Shared tab, and tap the plus icon. Name the album, invite participants, and tap Create. Everyone you invite can add photos. Tap the More icon inside the shared album, then Shared Album Details, to rename it, toggle whether others can add photos, enable notifications for new additions, and even turn on Public Website to make the album accessible via a web link. Shared albums compress photos to 2048 pixels on the long edge, though, and cap video at 720p resolution.
A quick selection trick: when adding photos to any album (shared or personal), swipe across multiple thumbnails and pull your finger down. This selects every photo in a continuous block without tapping each one individually. The gesture feels slightly imprecise at first because the selection boundary expands as you drag further, but once you get the timing down, it replaces dozens of individual taps.
For people closest to you, iCloud Shared Photo Library is a different tool entirely. According to Apple's support documentation, you can share one library with up to five people. The library creator provides the iCloud storage, and everyone else gets full access without it counting against their own plan. Photos and videos move into the shared library (they are not duplicated), and every participant can add, edit, and delete content.
Set it up from the Collections tab: tap your profile photo in the top-right corner, scroll down to Shared Library, and follow the prompts. Alternatively, go to Settings, scroll to Apps, tap Photos, and choose Shared Libraries.
Once enabled, a filter icon in the Library view lets you switch between your Personal Library, the Shared Library, or both. When you open a photo, the top-right corner shows a single-person icon (personal) or a two-person icon (shared). Tap the icon to move the photo between libraries. In the Camera app, the two-person icon controls where new photos land. Crossed out means personal. Yellow means shared.
The table below breaks down the two sharing methods so you can pick the right one without experimenting on your live library.
| Feature | Shared Albums | iCloud Shared Photo Library |
|---|---|---|
| Maximum participants | Up to 100 subscribers | Up to 6 (including creator) |
| Photo quality | Compressed (2048px long edge, 720p video) | Full resolution originals |
| Editing by participants | No | Yes, full editing for all participants |
| iCloud storage impact | Does not count against storage | Counts against creator's iCloud plan |
| Camera integration | Manual add only | Direct from Camera app with one tap |
| Best for | Events, large groups, public sharing | Family, close friends, ongoing collaboration |
Use People and Pets to Stop Scrolling Forever
In the Collections tab, tap the People and Pets header. Groups appear at the top, and individual faces sit below. You can reorder people by dragging them, or tap Sort and choose Sort by Name for an alphabetical layout. The plus icon lets you create a new group or add unrecognized faces that your iPhone has detected.
Tap any person to see every photo they appear in. Tap More, then Profile, to change their profile picture or link a contact card. From inside any People collection, a play button at the top generates a slideshow-style video using photos and clips from that person's collection. The bottom-left button switches the background music, and the adjacent button lets you rearrange the order of clips, add new ones with the plus icon, or press and hold any clip to delete it.
Five Quick Wins You Can Set Up Right Now
Search combines multiple terms. Tap the magnifying glass icon and type a person's name followed by a location or object. The search engine combines those terms to narrow results. Searching "Sarah beach" pulls up only photos of Sarah at a beach, skipping everything else.
Captions are searchable. Open a photo, swipe up, and add a caption. Anything you type there becomes searchable later. Starting captions with a hashtag-style keyword (like "#receipt" or "#whiteboard") creates an informal tagging system without building dedicated albums.
The Map view is underrated. Swipe up on any geotagged photo, tap its location, and then tap Show Nearby Photos. A map opens showing every photo taken in that area. You can also pin the Map collection (as described earlier) so it stays at the top of your Collections tab permanently.
Hidden photos are protected by Face ID. Tap More on any photo and choose Hide. The photo moves to a Hidden album inside Collections, and that album requires Face ID to open. Nothing is deleted; the photo simply disappears from your main library.
Drag and drop works across apps. In the Library view, touch and hold a photo. Move it slightly, then use another finger to swipe up and switch to a different app. Drop the photo into Notes, Mail, Messages, or any app that accepts images. The photo pastes directly without going through a share sheet. If you recently moved to iPhone and want to make sure all your old photos made the trip, our walkthrough on switching from Android to iPhone without losing a file covers the full transfer process.
Back Up Your Organized Library Locally
iCloud Photos keeps your library synced across devices, but a local backup gives you a second layer of protection that does not depend on internet access or monthly storage fees. When your photo library grows into the tens of thousands, a physical backup becomes less optional and more essential.
The SanDisk Phone Drive plugs directly into your iPhone's USB-C port (or Lightning port on older models) and works with the SanDisk Memory Zone app to back up photos, videos, contacts, and files. The 256GB model holds roughly 50,000 to 60,000 high-resolution iPhone photos, and transfers run at USB 3.2 Gen 1 speeds. The drive's swivel design protects the connector when it is in a bag, and it is Made for iPhone certified, so there are no compatibility surprises. One edge case worth noting: the initial firmware update prompt when you first plug in the drive feels unintuitive because the app does not explain what it is doing, but after that one-time update, backups are straightforward.

Here's the SanDisk 256GB Phone Drive for iPhone on Amazon: https://www.amazon.com/dp/B0DDQK1F9B?tag=zoneofmac-20
Accessibility and Clarity
Apple Photos works well with VoiceOver across most of its interface. Album names, collection headers, and filter buttons are all labeled, which means screen reader users can navigate the organizational features covered in this guide without sighted assistance. The filter and sort menus use standard iOS controls, so VoiceOver reads each option aloud as you swipe through them.
The drag-and-drop features (reordering pinned collections, rearranging slideshow clips) present a real friction point for users with motor limitations. These gestures require sustained pressure, precise movement, and sometimes a second finger. Apple offers Switch Control and AssistiveTouch as alternatives, but neither fully replicates the multi-finger drag described in this guide. For photo editing accessibility on iPhone, our roundup of iPhone photo editing apps that deserve your camera roll evaluates VoiceOver support across several editors.
Cognitively, the Collections tab can feel overwhelming because it presents albums, people, trips, maps, and media types all in one scrollable feed. Pinning your most-used collections to the top (covered earlier) reduces the cognitive load significantly. Instead of scrolling through a long list every time, you see your two or three most important destinations immediately. Collapsing sections you rarely use further simplifies the view.
Quick-Action Checklist
- Open Photos, tap the filter icon in the Library view, set your preferred sort order (Date Captured or Recently Added), and turn off screenshots in View Options.
- Switch to Collections, tap Edit next to Pinned, and add your two or three most-used albums or collections.
- Open any album, tap the filter icon in the bottom-left corner, go to View Options, and turn off Large Key Photo.
- Open a photo, tap Share, and tap Copy iCloud Link. Paste it anywhere for full-resolution sharing that lasts 30 days.
- Tap People and Pets in Collections and verify that your most frequent contacts have linked contact cards.
- Swipe up on a photo and add a caption starting with a keyword for instant future searchability.
- Pin the Map collection so you can browse photos by location with a single tap.

Related Posts
iOS 26.4.1 Fixes the iCloud Bug That Broke Your Apps
Apr 09, 2026
iOS 26.4 Drains Your iPhone Battery. Here’s What Fixes It
Apr 09, 2026
Your iPhone Finally Lets You Create Custom Ringtones in iOS 26
Apr 08, 2026